Fading your own hair sounds harder than it is, but it is not quick, and rushing is exactly what turns a fade into a set of visible steps. The skill is not strength or speed. It is patience and a feel for how clipper guards overlap. Give it an hour the first time and you can get a clean result at home.
What You Need First
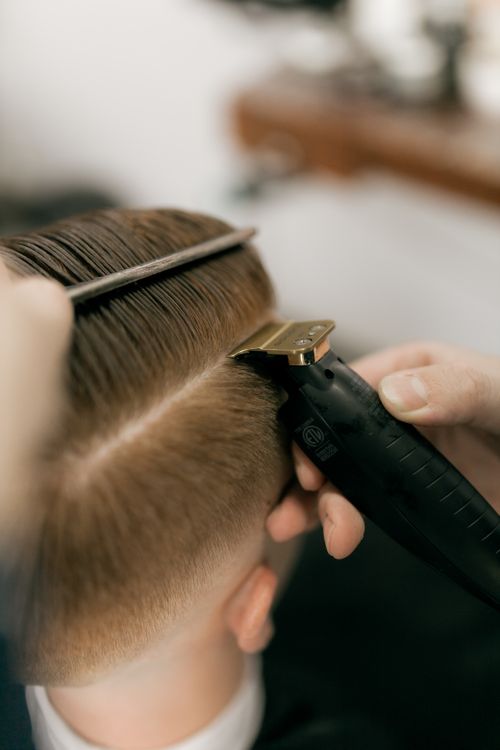
You need a decent set of clippers with a full run of guards, a handheld mirror to see the back, and good light. A set with guards from 1 to 8 covers everything. If your clippers have a taper lever on the side, learn it, because it lets you make tiny length changes between guards, which is where smooth blending happens.
Start Long, Go Shorter
The golden rule of fading is to start with a longer guard than you think you need. You can always take more off. You cannot put hair back. Begin the sides and back with a longer guard, say a 4, and only step down once you see how it looks.
Set the top aside for now. A fade is about the sides and back blending from short at the bottom to longer as you move up. The top is a separate step you blend into last.
Build the Fade in Guard Steps
The fade itself is a stack of guard lengths, shortest at the bottom. A simple low fade might run a 1 at the bottom, a 2 above it, then a 3, then a 4 toward the top of the sides. Each guard leaves a visible line where it meets the next. Your whole job after that is erasing those lines.
Work around the entire head at each guard length before stepping up, so both sides match. Doing one side fully then the other is how you end up lopsided.
"A fade is not about cutting hair short. It is about erasing the lines between lengths until short becomes long with no seam you can point to."
Blend the Lines Away
This is the part that separates a real fade from a striped mess. To blend, use the guard one size up and flick the clipper outward and up as you reach the line between two lengths. That flicking motion, sometimes called scooping, feathers the longer hair down into the shorter, softening the hard edge. Go slow, check the mirror, and repeat over any line that still shows.
A taper lever helps here. Set a guard, then nudge the lever halfway to create an in-between length that bridges two guards without swapping attachments.
Finish the Top and Edges
Once the sides and back are blended, cut the top to your length, with a guard or with scissors, and blend where the top meets the faded sides using the same flicking motion. Last, clean the edges: the neckline, around the ears, and the sideburns. Use the bare clipper or a trimmer for crisp lines, but keep the neckline natural rather than a hard straight block, which grows out awkwardly.
Where People Go Wrong
The two most common mistakes are starting too short and not blending enough. Starting short leaves you no room to fix anything. Skipping the blend leaves visible steps that shout home haircut. The third mistake is impatience: a good self-fade takes time, and the moment you hurry, the lines stay in. Do it slowly the first few times and speed comes on its own.